WarpNet
Introduction
WarpNet let multiple users deform content at the same time, from a lightweight laptop that can be taken on-stage.
Setup
Start Producer and open the show
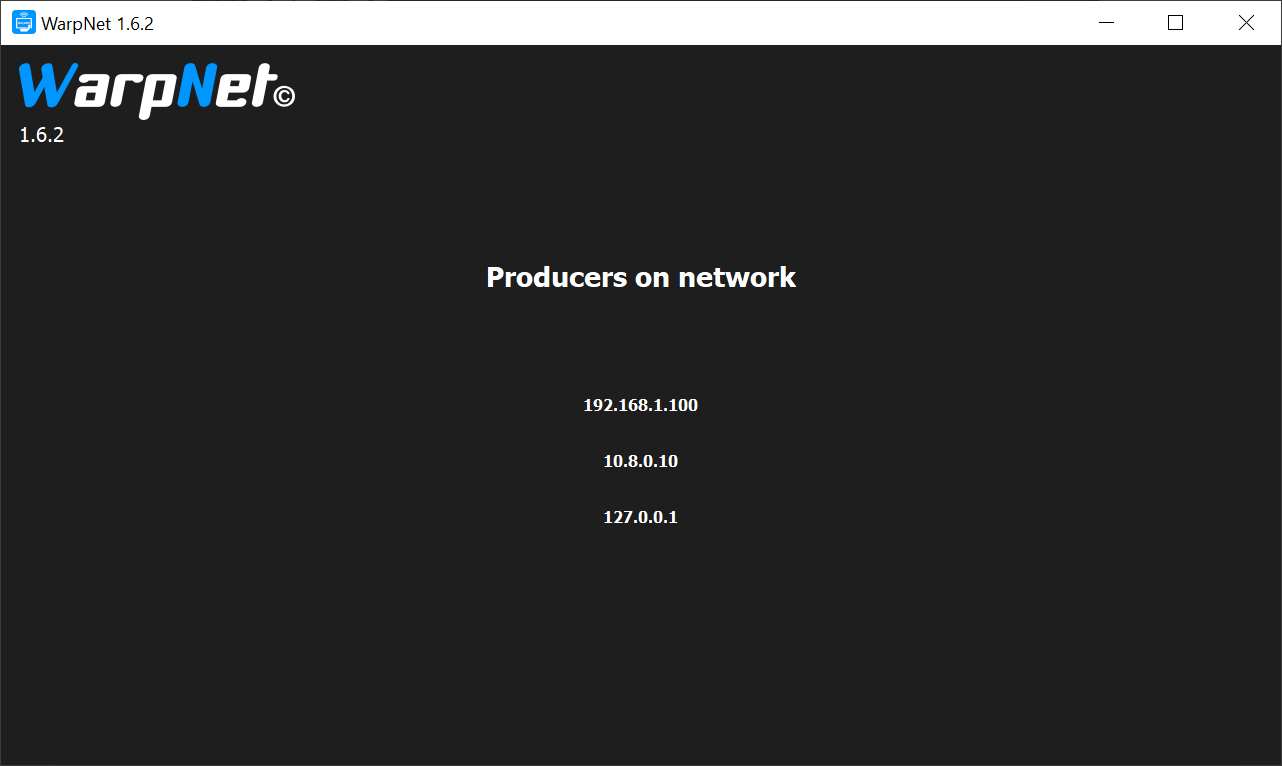
Start WarpNet. The running Producer should be automatically detected. If not, check your network. Select the correct IP.
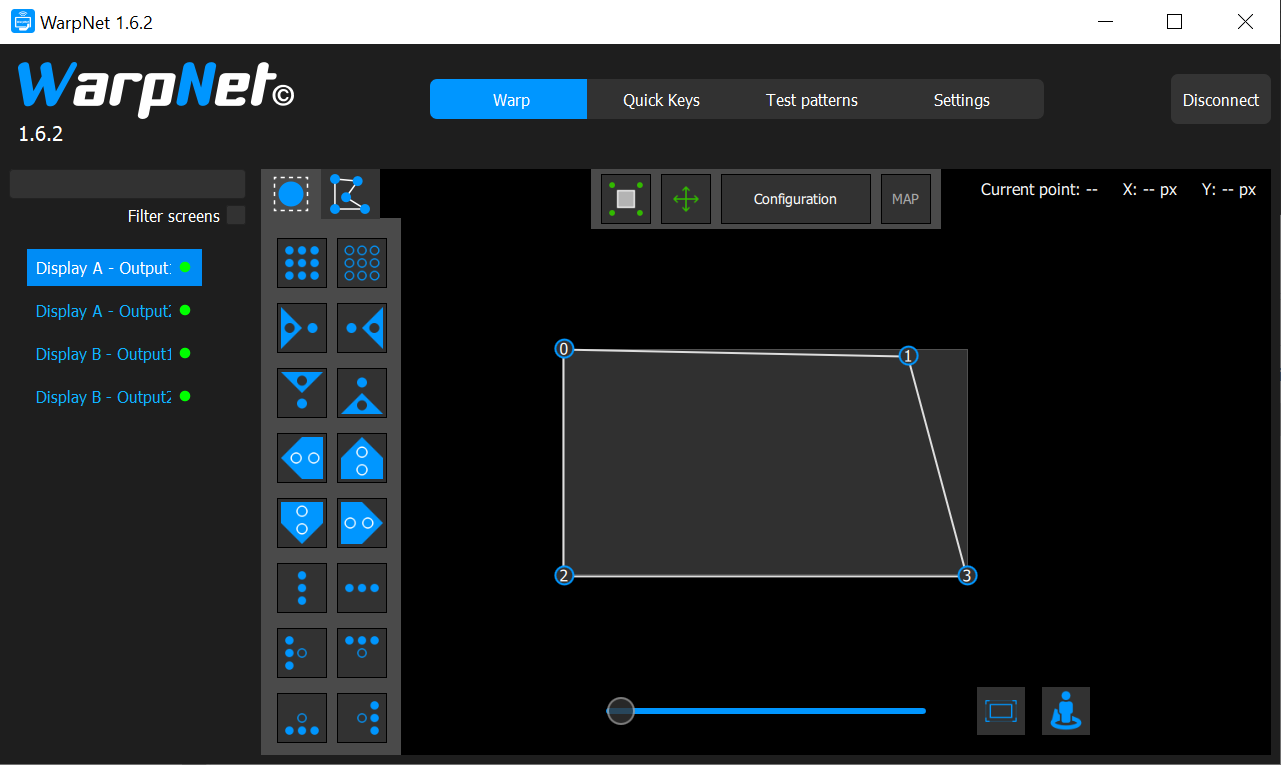
WarpNet the lists all the Outputs of the show. Select one of them.
If this output doesn’t have a deformation yet, click “Configuration” and add it. You can now select the deformation points using the mouse, and move them using either the mouse, or the usual keyboard shortcuts (see later sections for full reference).
Deforming cues
By default, media cues are not visible on WarpNet. The operator must explicitly make them available. On Producer, right-click on a cue, and select “Send to WarpNet”:
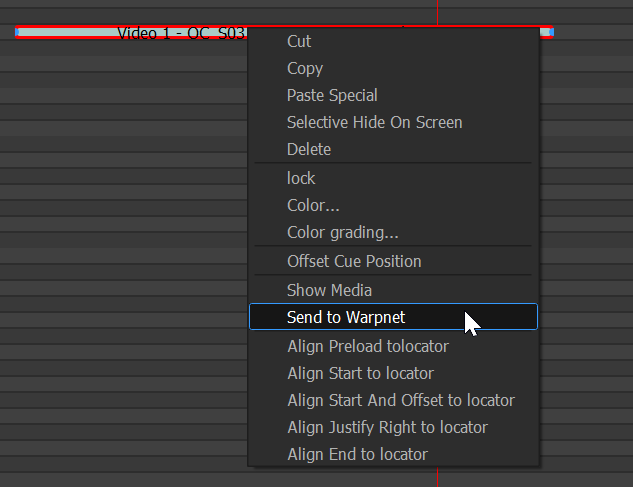
The cue can now be deformed normally on WarpNet.
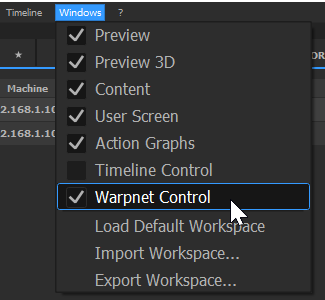
The WarpNet Control window lists all the cues that are visible on WarpNet:
To remove a cue from WarpNet, right-click on it in the WarpNet control window, and select “Remove”.
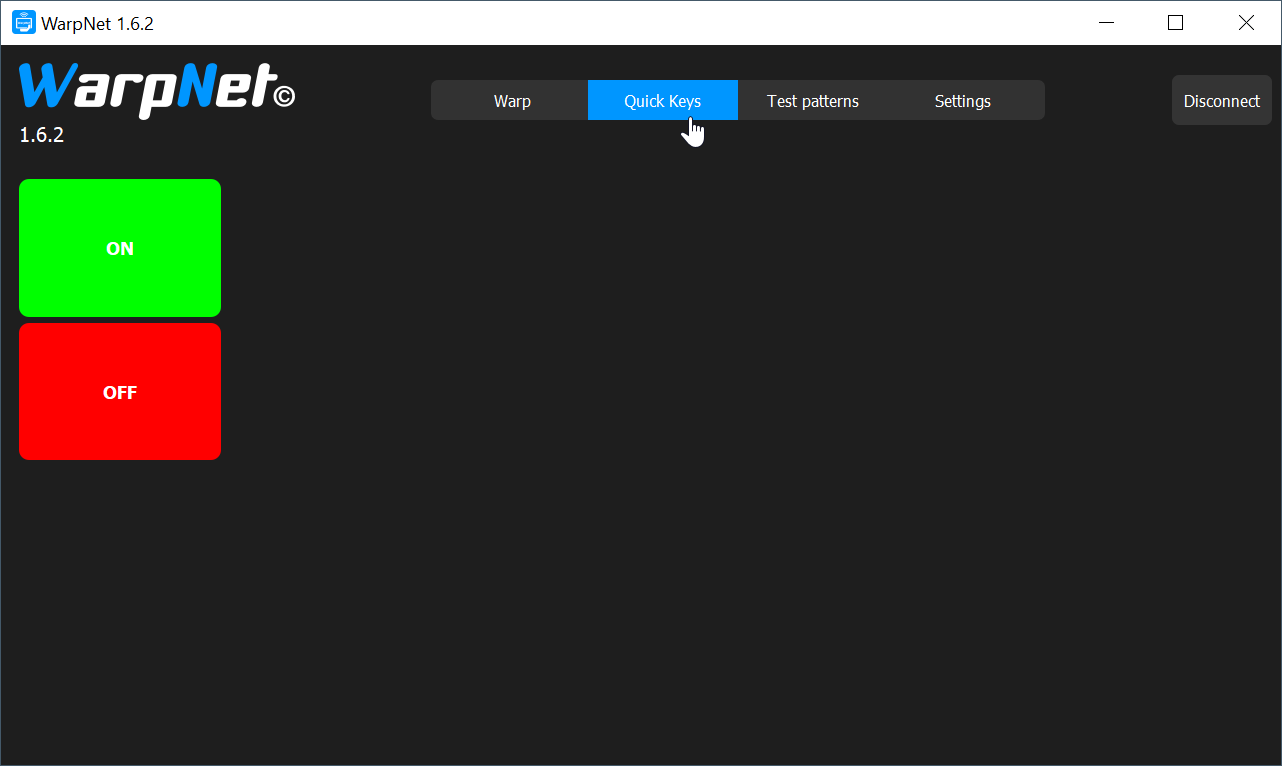
QuickKeys
WarpNet can also trigger QuickKeys, but this must be explicitly enabled by the OnlyView operator. Right-click on a QuickKey, select Edit, then check “Visible on WarpNet”:
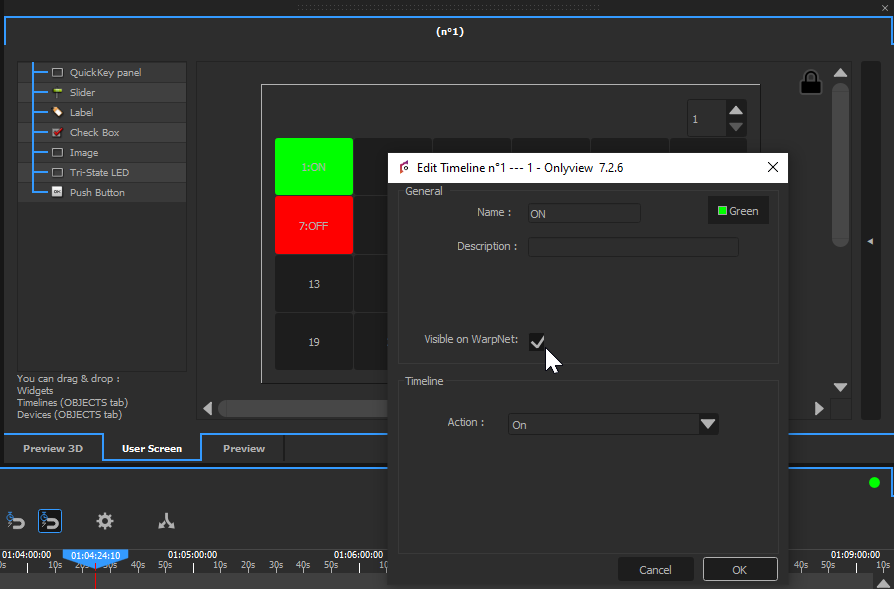
The desired QuickKeys will now appear on WarpNet, and all WarpNet operators will be able to trigger them.
Full reference
Left panel
In the left panel, the search bar can filter for specific content. When the “Filter screens” checkbox is checked, only media cues are visible.
The P and M keys moves up and down between screens/cues.
Space toggles a screen/cue on and off.
T toggles “Filter screens” on and off.
Deformation toolbars
In the first toolbar, the following selection tools are available. These actions are similar to Producer.

In the second toolbar, the following tools are available :
Horizontal/vertical mirror: inverts the deformation only, keeping the content in the same orientation. For instance, if you moved the top-left corner, the top-right corner will be moved instead; but any text on the media will still be legible.
Horizontal/vertical flip: Inverts the deformation and the media.
UV -> XY: This is useful to add a deformation to a small part of a cue. Keep the base cue and duplicate it. Edit this second cue in WarpNet. In MAP mode (= UV mode), select just the part that you want to deform. Then press uv2xy. At this point, the second cue perfectly overlaps the first one, but just on the small region you selected. You can then deform this specific region.
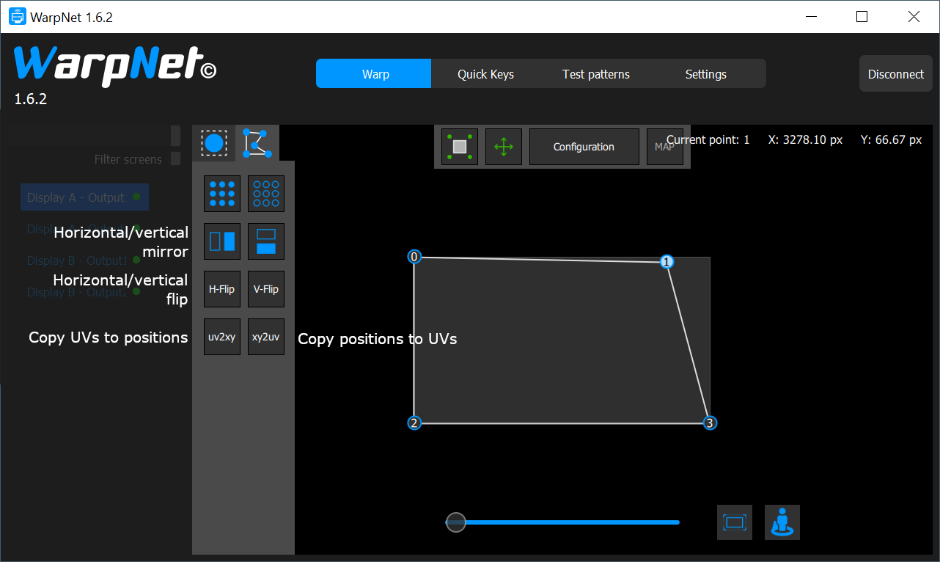
Deformation area
Top area

Button 1: When enabled, movements will be restricted inside the cue’s area
Button 2: Locks/unlocks all movements
Configuration: Create/remove/reset a deformation
MAP: When disabled, the deformer’s positions are edited. When enabled, the deformer’s texture coordinates (“UVs”) are edited.
Bottom area
Zoom slider and “fit” button: adjust the view
Viewport rotation: Sometimes you are not in the same direction than the videoprojector. For instance, you might be facing it. In this case, deforming the screen is complicated, because controls are inverted. This menu reorients the controls so that they feel more natural. Keyboard shortcut : R.
Settings
Each WarpNet can display its selected points directly on-stage, for easier manipulation and control. Color and shape are configurable per-WarpNet, so that multiple operators can work at the same time.