Media List
The Media list
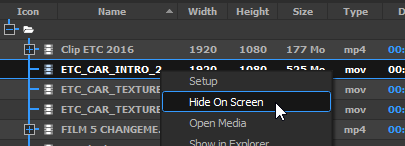
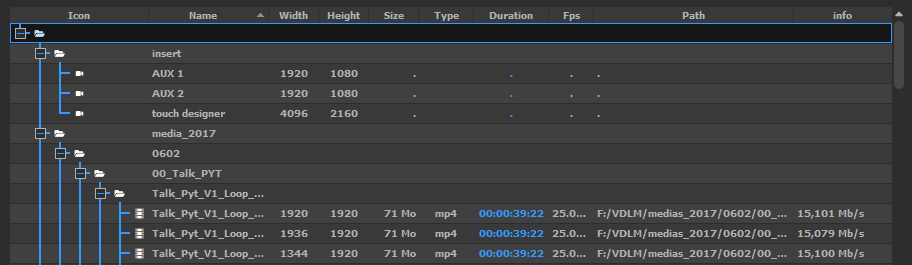
The MEDIA tab contains the media list, which shows all the media that have been added to the show, and are ready to be used on a Timeline:
Supported medias
Onlyview supports the following media types:
Video: Image sequences, MPEG-2, h.264, h.265, HAP, HAP-Q, HAP-a, HAP-Qa, NotchLC, ProRes (all variants)
Images: TGA, PNG, JPEG, BMP, PSD (with independent layers), TIFF
Sound: WAV, AIFF, FLAC, MP3, OGG
Streaming: SDI (using Decklink cards), NDI
Generative content: Notch, Spout (for Unreal Engine/ Unity/ other), TouchEngine
Adding a new media
The most common way to add a media to the media list is to use the Add Media button:

You can also import a whole folder using the Add Folder button; or directly drag&drop a media in the list.
One exception is Image Sequences: you need to use the Add Image Sequence button instead.
TextureAreas
TextureAreas capture a part of the stage; and this capture can be re-used at a different place.
They are similar to Compositions in other software.
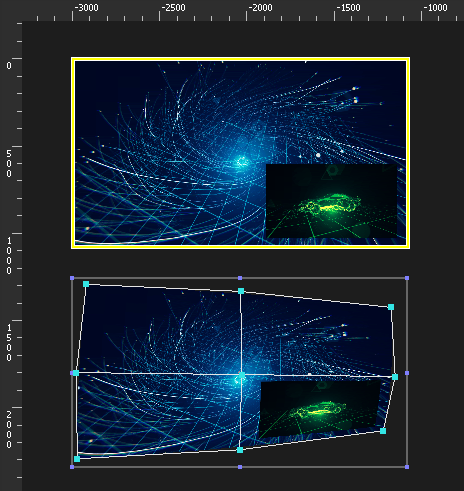
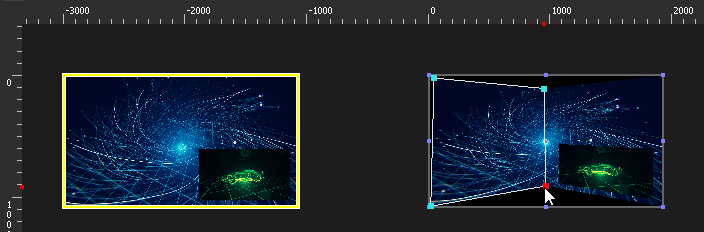
In this example, a TextureArea captures 2 medias that are overlayed. The capture zone is delimited by the yellow rectangle.
The TextureArea can now be used as a regular Cue (below). Its content will behave as a normal media: deforming the cue will now deform the blue video and the green video at the same time.
It is common practice to render all the medias into a TextureArea, and not directly into the Media Servers. This has several advantages:
-
This separates the "content" part of the Show from the "calibration" part: The media just go in the TextureArea, without taking anything else into account; and the deformations/calibration/colorimetry is done once, elsewhere.
-
In a 2D workflow, it makes it easy to create deformations by cutting small parts of the TextureArea, and mapping them independently:
- In a 3D workflow, TextureAreas are required to show content on a 3D mesh.
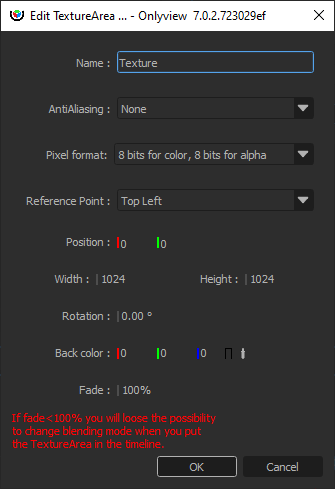
AntiAliasing: How many samples will be stored for each pixel. Note that antialiasing is important when receiving a deformed cue:
-
When rendering a FullHD media in a FullHD TextureArea without deformation, antialiasing is useless -- there is already a 1:1 match between pixels.
-
Rendering a x8 perfectly antialiased TextureArea into a non-antialiased screen will still produce hard edges.
So antialiasing should usually be set on the "receiving" TextureArea.
Pixel format: The pixel format impacts the quality and the memory/performance of rendering in the TextureArea, and displaying the TextureArea cues.
-
8 bits for color, 8 bits for alpha: This is the default, which provides the usual 256 colors per channel, and 256 levels of transparency.
-
10 bits for color, 2 bits for alpha: Used when working with opaque 10-bit media
-
12 bits for color, 12 bits for alpha: Used either when working in 12 bits, or when the previous mode does not handle alpha well enough.
-
16 bits for color, 16 bits for alpha: Usually overkill.
Note that when using a 10-bit TextureArea or above, it's important that the next surface in the pipeline is 10-bit too, otherwise this extra precision will be lost in an 8-bit buffer. In particular, see DisplaySetup pixel format settings.
Reference point: Which corner the position sets. The rotation is expressed with respect to this point.
Position: Position of the TextureArea, in Stage coordinates.
Rotation: Rotation of the TextureArea, in degrees.
Back color: Background color of the TextureArea. Opaque black by default.
Fade: Opacity of the background. Fully opaque by default.
Decklink SDI input
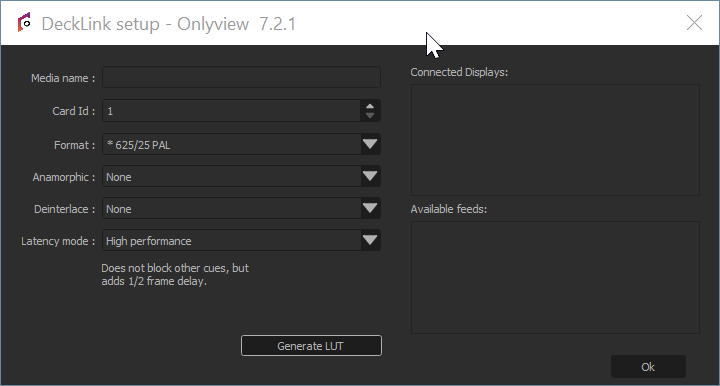
Onlyview can use Decklink acquisition cards to input SDI signal. The basic usage is to click on the Add Decklink Media button:
Media name: A name that is meaningful to you.
Card Id: There can be multiple Decklink card on a computer, each with multiple ports, which can be configured individually using the Decklink tool. So unfortunately, there is no good way for us to know which ID corresponds to which port, so you often need to test them all...
Source: Depending on the model, Decklink cards can input SDI only, or HDMI, Optical SDI...
Format: This is needed to initialize the cue's dimensions, and to check that the input signal corresponds to the required format.
Anamorphic: The cue can be rescaled vertically to take anamorphic scaling into account.
Latency mode:
-
High performance: This is the default. When rendering the frame, Media Server just draws whatever image arrived last.
-
Low latency: Media Server waits a few milliseconds until a new image arrives. The advantage is less latency; the drawback is that frames take longer to render. And if you are not genlocked, the frame duration will vary at each reboot. You can monitor the frame duration using the CPU mire.
The Card ID is also impacted by DisplaySetup:
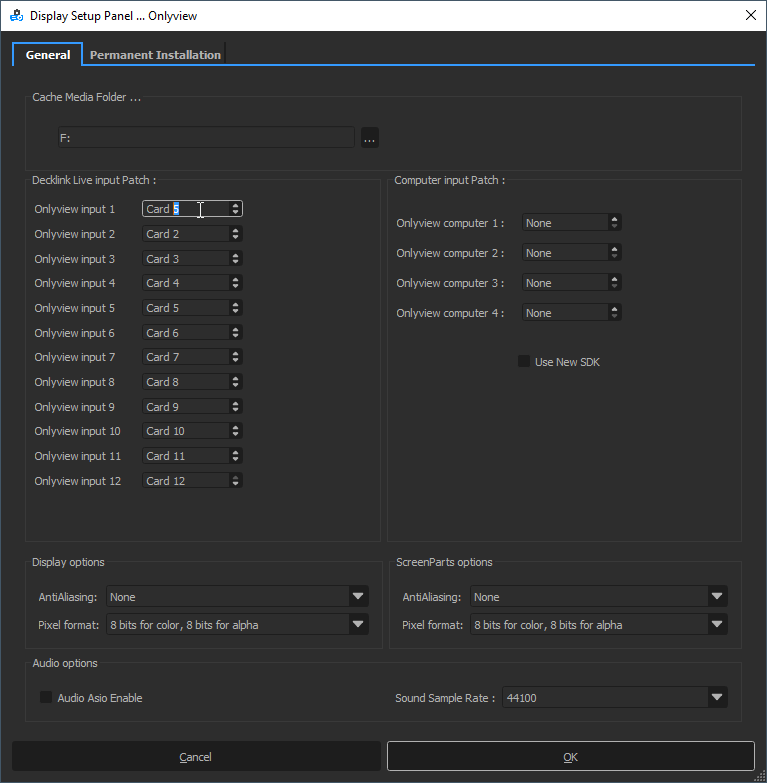
Since all Media Servers are not necessarily wired in the exact same way, "Decklink Live input Patch" can add exception for specific machines. For instance, in the screenshot above, trying to use Card #1 will in fact use Card #5 on this Media Server.
NDI
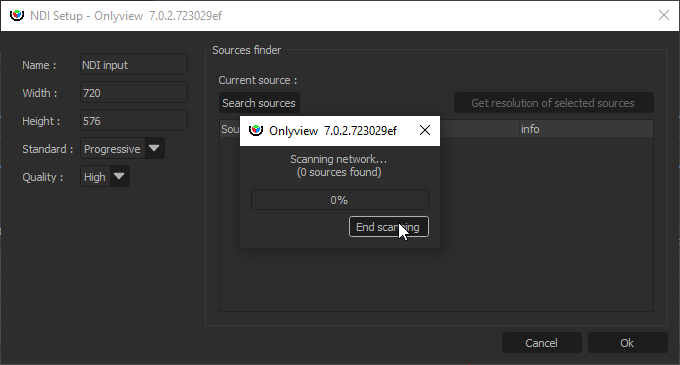
An NDI media can receive an NDI stream, that is, a video stream that is h.264-encoded, and transported over IP.
Width, Height: Size of the cue; does not necessarily match the resolution of the NDI stream.
Standard: This setting should currently be set to Progressive.
Quality: High (the default) or Low (allows for bandwidth gains)
NDI sources are exposed on the network, and are discoverable. To scan the network for existing senders, click "Search sources". This will allow you to auto-fill the parameters above.
Spout
A Spout receiver can share a GPU buffer with a separate Spout-enabled application, for instance Unreal Engine or Unity3D.
This makes it possible to add real-time generative content into Onlyview.
Note that the 3^rd^-party application must run on all Media Servers at the same time. As such, they need to provide deterministic behavior. In particular, particles are often problematic.
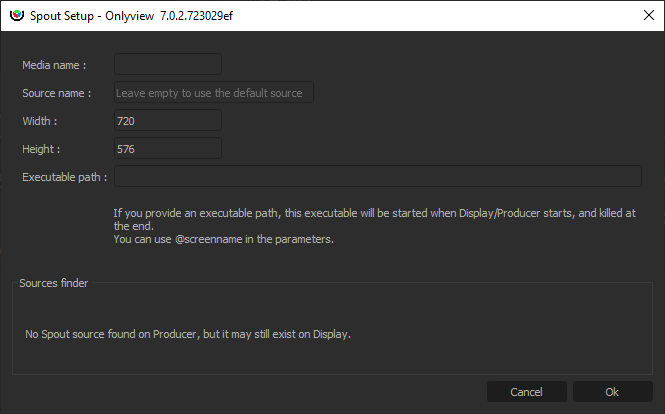
Media name: A name that is meaningful to you
Source name: Each Spout sender identifies itself by its name. There are several options:
-
If you know the name, just enter it.
-
You can run the sender on Producer; the source will then appear in the Sources finder.
-
If there is only 1 source, you can leave the field empty, and Spout will auto-select the first source.
Width/Height: The size of the cue. Does not need to match the stream resolution.
Executable path: The content is provided by a separate executable. You can start and stop it manually, but this is cumbersome, because this needs to be done on all Media Servers, which are usually not easily accessible.
Instead, Onlyview can start and stop if for you: If you enter D:/path/to/my/content.exe, each Media Server will start the application at Ctrl-O. This is still problematic because you have to copy content.exe on all Media Servers; so an easier way is to use a shared folder, for instance \\creative-pc\share\content.exe
You can also pass command-line arguments to the executable, like --no-fullscreen or --currentscreen=\@screenname , so that you can add extra logic in your application depending on which Media Server it is running on.
TouchEngine
Onlyview can play a TouchDesigner project (.tox file) as generative real-time content,
using the TouchEngine runtime.
TouchDesigner or TouchPlayer must be installed on the servers and on Producer, with paid TouchDesigner or TouchPlayer licenses (Educational, Commercial, or Pro ; see TouchDesigner Licensing page for details on how to install licences).
For setup options (resolution, output path, frame rate) and instructions on how to create
a compatible .tox file in TouchDesigner, see the TouchEngine page.
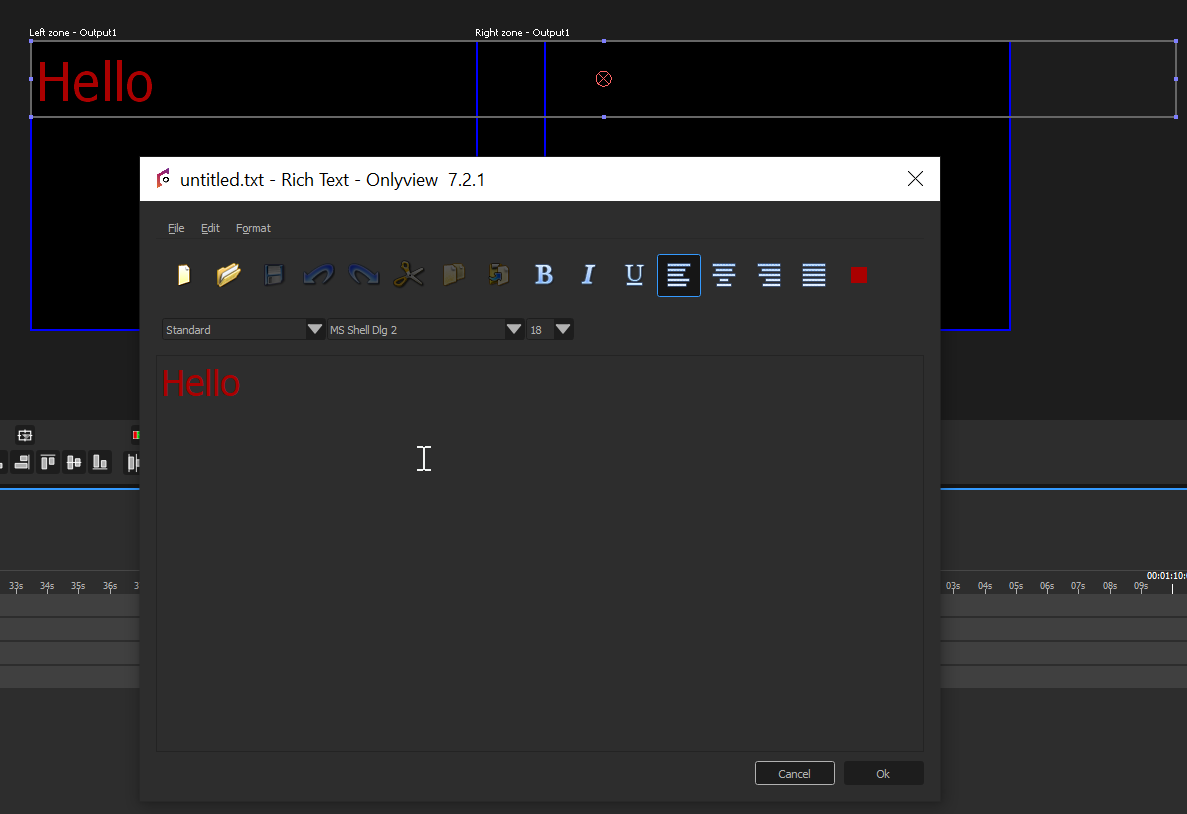
Text
A basic text media that can be edited.
Limitations -- You need to set Windows' desktop scaling to 100% on both Media Server and Producer, so that the rendering is consistent between all machines.
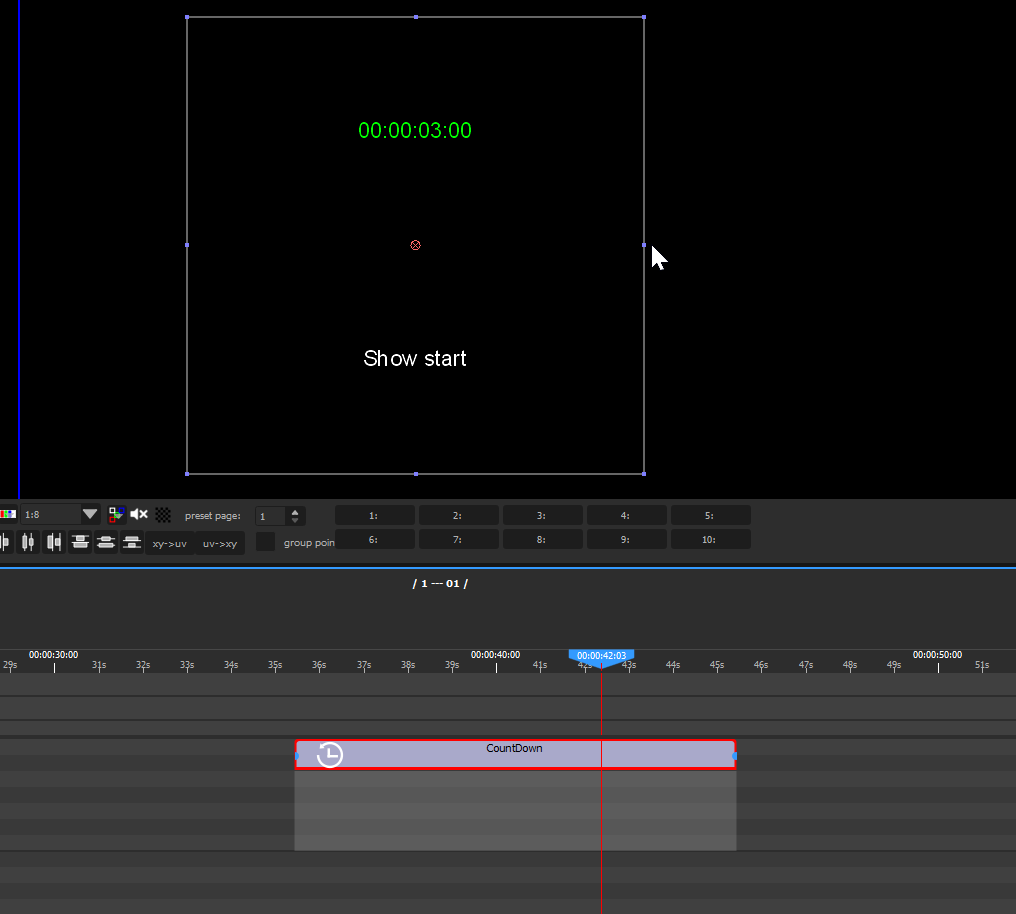
Countdown
A countdown media displays a clock that can be used to foresee how many seconds remain before another cue starts playing, for instance:
Audio
Onlyview accepts the following audio formats: aif, mp3, wav, ogg, flac.
For a Media Server to play audio, it must be enabled in the Edit Media Servers screen:
Onlyview can either output on standard audio cards, or in ASIO for compatible cards. ASIO is required for multi-channel audio.
The output card and the output frequency are selected in DisplaySetup (also accessible in Edit Media Server). If the input file does not have the correct frequency, it will be automatically resampled so that it plays correctly.
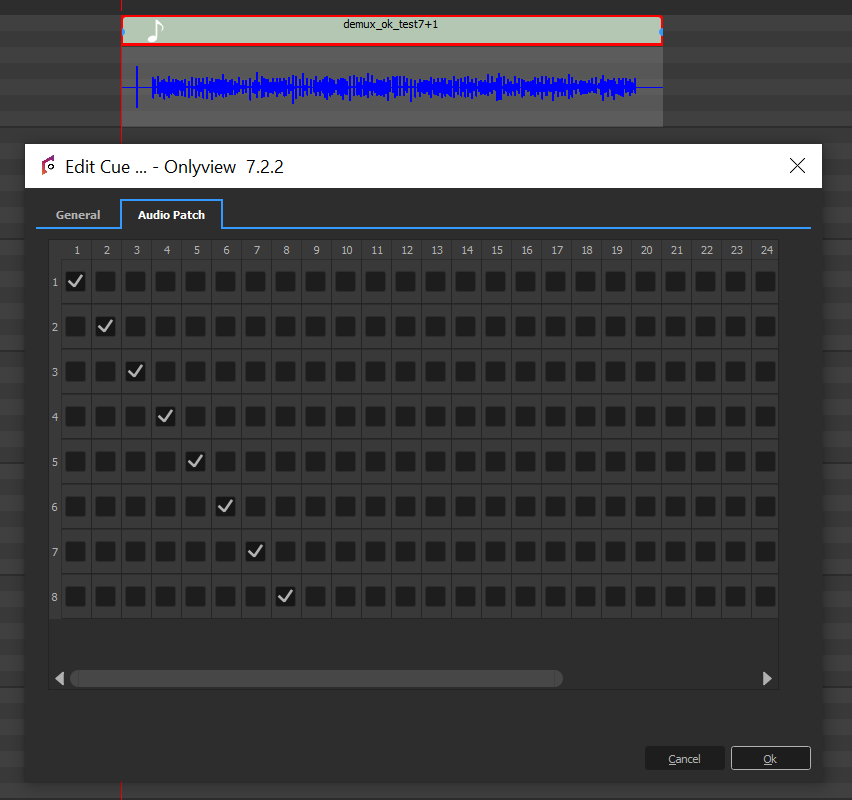
Editing an audio cue also gives access to the patches: each input channel can be remapped to any output channel. Input channels can also be played on multiple outputs, or muted entirely.
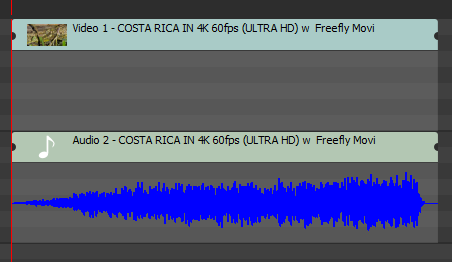
When importing a movie container (MP4, MKV, ...), all audio streams will also be listed in the media list:

Dragging the container in the timeline will create multiple cues, one for each stream. This allows for fine synchronization between audio and video.
Selective Upload
Selective Upload gives the user more control over which Media Servers each media is uploaded to.
Use Cases
Normally, all media are uploaded to all Media Servers. However, in some cases, it is desireable to prevent some Media Servers from getting the file:
- Large videos can be divided into multiple parts for different Media Servers for playback performance (e.g., left half and right half of a wide screen)
- Preventing large media files from being stored on Media Servers where they won't be used
- Manually optimizing the upload time when some Media Servers don't need a file
How to Use
This feature is available for both individual media files and TextureAreas. To configure selective upload:
- Right-click on a media or TextureArea in the media list
- Select "Selective Upload" from the context menu
- In the dialog that opens, choose which Media Servers should receive the media
- Click "OK" to apply the settings
The dialog shows each Media Server with options to either upload or not upload the selected media. Changes take effect on the next Ctrl-O.