Interacting
Interacting with the timeline
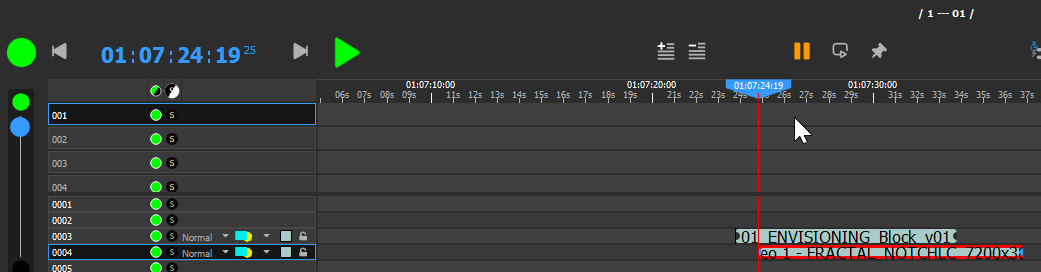
Each timeline has:
-
An on/off button, to completely hide the whole timeline.
-
A GrandMaster, on the left. Clicking on the black and green buttons will make the grandmaster automatically fade in a user-configurable time (by default, 3 seconds).
-
A play/pause button
-
A current timecode
-
A locator that can be dragged using the mouse, or controlled using keyboard shortcuts.
Timeline setup

Link Timeline: Doing play/pause/locate actions on the current timeline triggers the same actions on the linked timeline.
AutoStart: If enabled, the timeline will automatically play when Producer starts. This is mostly useful for show control, like starting the Media Servers via WakeOnLan or similar actions. See the Command Cues chapter for details on how to add actions on a timeline.
Multiple timelines
New timelines can be created in the Content window, Objects tab
Timelines can be re-ordered:

Just as layers are rendered top to bottom, timelines are rendered left to right. Normally, this means that a cue in Timeline 2 can hide a cue in Timeline 1. But if timelines are reordered, Timeline 2 can be shown first (so, below).
Dual Locator
Normally, changing the timecode by dragging the Locator is immediately taken into account by all Media Servers.
The Dual Locator makes it possible to edit or preview a part of the Timeline, while Media Server runs at a different timecode.
To enable the Dual Locator, press the following button:

The timeline will now show two locators, the usual blue one, and a yellow one.
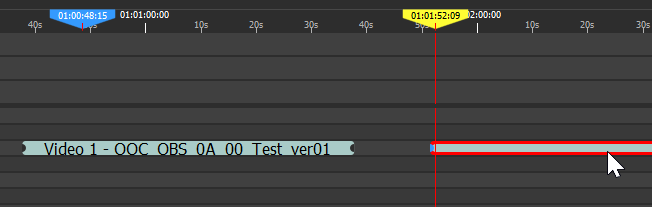
The blue one shows what Media Server is playing. The yellow one is the "working" locator, used to add cues, animations, etc.
All changes are live; in particular, care should be taken to avoid adding cues in a zone where Media Server is playing.
Usual keyboard shortcuts like Space, T, Y, etc, work and are applied on the yellow locator. In order to play/pause/locate the Media Servers, you have to explicitly exit the Dual Locator mode by re-clicking on the button.
Auto-crossfade
Auto-crossfade lets you jump from any point to any other point in a timeline, without any hard cut, and without the need to pre-encode a transition.
For instance, this is what a traditional, keyframe-animated crossfade looks like:
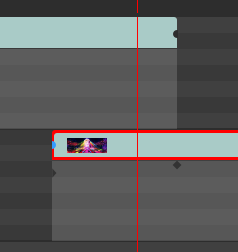
The cues must be precisely positioned, and opacity keyframes must be hand-placed.
On the contrary, when auto-crossfade is enabled, the cues can be anywhere, without any special preparation. Just right-click on a cue, and select "Locate & Play here":
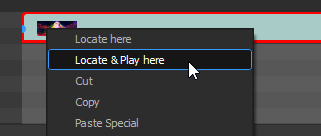
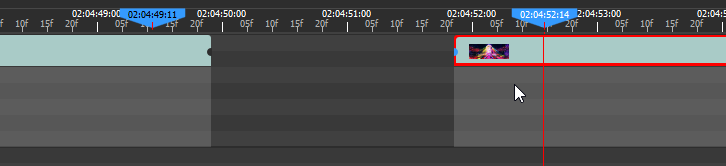
For 1 second, Onlyview will smoothly crossfade between the two cues. On the timeline, two locators will be playing:
Auto-crossfade is enabled using this button:
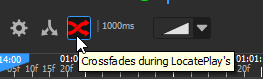
The duration of the crossfade can be configured per-timeline, as well as the crossfade type:
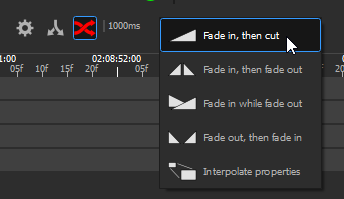
-
Fade in, then cut: The old cue keeps playing at 100% opacity; the new cue starts at 0% opacity, and gradually ramps up to 100%. At the end, the old cue is cut, and only the new cue remains. This is the default, since it gives the best result for video.
-
Fade in, then fade out: The old cue keeps playing at 100% opacity; the new cue starts at 0% opacity, and gradually ramps up to 100%. In a second step, the old cue fades out to 0%, and only the new cue remains.
-
Fade in while fade out: The old cue fades from 100% to 0% while the new cue fades from 0% to 100%, at the same time. This is generally undesirable for video, because in the middle, both will be at 50%, giving a dark appearance. However, this is desirable for audio, because it keeps the general audio level constant. Thus, all audio cues use this mode, regardless of what the user actually chose as a global timeline parameter.
-
Fade out, then fade in: This is a fade-to-black.
-
Interpolate properties: Allows to smoothly transition between 2 cue positions. All the animatable cue properties can be interpolated: position, color, effect parameters, masks, etc.