Vector Masks
Vector Masks
Vector Masks provide advanced masking capabilities using animated Bézier curves. This can be used for precise compositing work, rotoscoping, and creating animated reveals.
Overview
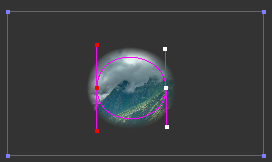
Each media cue can have multiple vector masks that define which parts of the content are visible. Unlike simple crop operations, vector masks use smooth Bézier curves that can create organic, flowing shapes. These masks can be animated over time.
Creating Vector Masks
To add the first vector mask to a cue:
- Select the desired cue
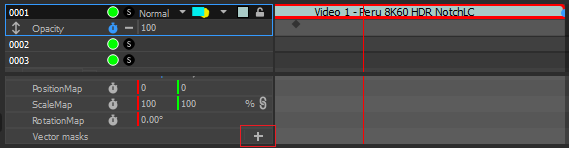
- In the 2D preview, in the right panel, click on the "Vector masks" icon to switch to vector mask editing
- Just below, select the "add points" tool
- Start tracing

The full list of masks can be accessed in the list of all cue parameters:
- Select the desired cue
- Right click -> Edit all cue parameters (or: Ctrl-double-click on the cue)
- In the bottom panel that opens, navigate to the Vector Masks section
- Click "Add Shape" to create a new mask
Working with Shapes
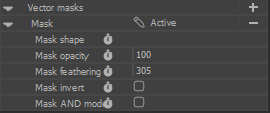
Each vector mask is defined by a series of control points that form a closed shape:
- Opacity: Controls how strongly the mask is applied (0-100%)
- Feathering: Softens the edges of the mask for smoother transitions
- Mask Invert: When off (the default), the drawn path describes the visible zone. When on, it describes the hidden zone, and the rest of the image is visible instead.
- AND mode: When off (the default), the visible zone of this mask is added to the previous masks, expanding the visible zone. When on, only the zones that are visible in the current AND the previous mask are visible.
Animation and Keyframes
Vector masks support full keyframe animation:
- Position Animation: Move the entire mask over time
- Shape Animation: Change the form of the mask by animating individual control points
- Opacity Animation: Fade masks in and out
- Feathering Animation: Vary the softness of edges over time
To animate a mask property: 1. Position the timeline at the desired time 2. Modify the mask property (position, shape, opacity, or feathering) 3. A keyframe is automatically created 4. Move to a different time and change the property again to create motion